
When it comes to revamping your garage, the flooring might not be the first thing that comes to mind. However, investing in the right flooring solution can make a significant difference in both aesthetics and functionality. One option that has gained immense popularity is epoxy floor coating. A great addition for home improvement! Below is a breakdown of our epoxy floor coating process.
The first step in our epoxy floor coating process is our team scheduling an initial consultation to assess your garage and discuss your preferences and requirements for the epoxy floor coating with chips. We’ll provide you with information on the process, materials, color options, and any other relevant details.
Before beginning the epoxy coating process, we will ensure the garage is cleared of any items, tools, or vehicles. Our team will then thoroughly clean the floor, removing loose dirt, dust, and debris. We’ll also address any cracks or damaged areas by applying a concrete patching compound and allowing it to dry and cure properly.
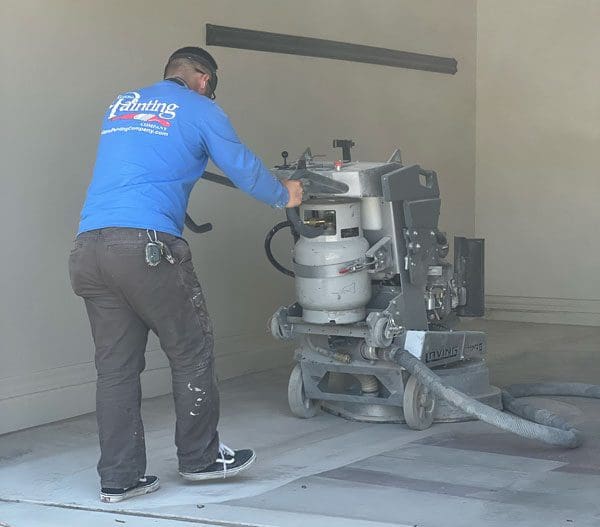
Depending on the condition of the floor, we will either etch or grind the surface to create a rough texture for optimal epoxy adhesion. Etching involves applying a solution to the floor and scrubbing it with a stiff-bristle brush, while grinding entails using a floor grinder with a diamond grinding attachment. This step helps ensure a long-lasting bond between the epoxy and the concrete.
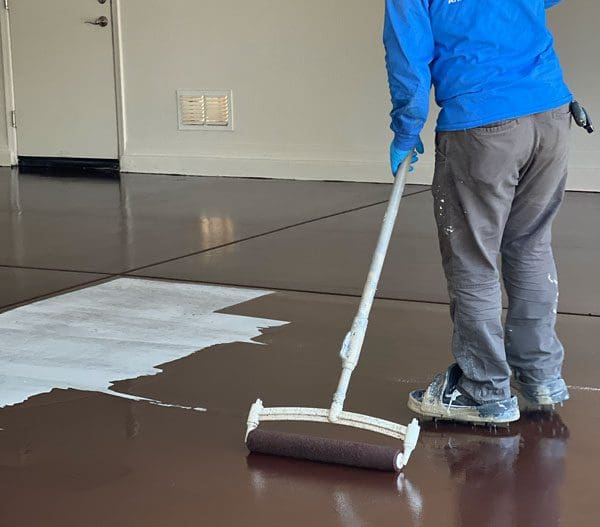
We will mix and apply an epoxy primer to the prepared floor. This primer promotes better adhesion and helps seal the concrete. Using a roller or brush, we will apply the primer evenly, working in small sections. It’s essential to follow the recommended thickness and curing time specified by the manufacturer.
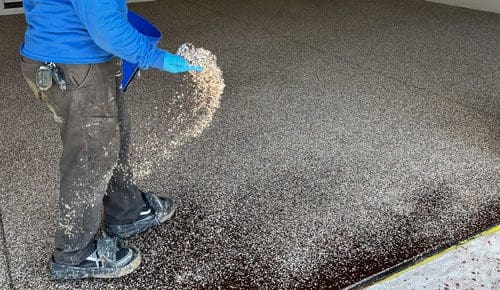
Once the primer is applied, we will mix the epoxy base resin with the hardener according to the manufacturer’s instructions. The mixed epoxy will be poured into a roller pan or bucket. We will then sprinkle decorative chips or flakes onto the wet epoxy primer, ensuring they are generously applied for full coverage and an even distribution. The chips come in various colors and sizes, allowing you to achieve your desired aesthetic.
After the chips are applied, we will mix and apply an epoxy topcoat. This topcoat encapsulates the chips and provides a durable, glossy finish. We will use a brush to cut in along the edges and corners of the floor, followed by a roller to apply the topcoat in small sections. The goal is to achieve a thin, even coat that fully covers the chips.
Once the epoxy topcoat is applied, we will allow the floor to cure fully according to the manufacturer’s instructions. This curing period ensures the epoxy reaches its maximum hardness and durability. During this time, it’s crucial to keep foot traffic, vehicles, and heavy items off the floor. The curing process typically takes several days.
Once the epoxy floor coating is fully cured, our team will perform a final inspection to ensure the quality and integrity of the coating. We will address any touch-ups or adjustments if needed. Finally, we will hand over your newly coated garage floor, providing you with care instructions and answering any questions you may have.
We take pride in delivering high-quality epoxy floor coating services with chips, transforming your garage into a functional and visually appealing space. Our team is committed to providing exceptional results, and we look forward to working with you to achieve your desired epoxy floor coating.